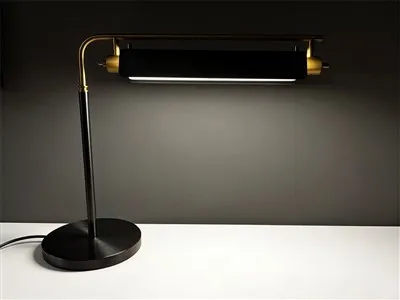
Properly installing an aisle wall lamp is not only crucial for its functionality but also for enhancing the overall aesthetic appeal of the aisle. As a trusted aisle wall lamp supplier, I'm here to guide you through the process step by step, ensuring that you can enjoy the perfect lighting solution for your space.
Step 1: Choose the Right Aisle Wall Lamp
Before you start the installation process, it's essential to select the right aisle wall lamp that suits your needs and preferences. At our store, we offer a wide range of high - quality aisle wall lamps, including the Bubble Glass Aisle Wall Light, which features a unique bubble glass design that diffuses light beautifully, creating a warm and inviting atmosphere. The Luxury Modern Crystal Wall Lamp is another excellent choice for those who prefer a more glamorous look. Its crystal elements add a touch of elegance and sparkle to any aisle. If you're into a more contemporary and simple style, the Minimalist Line Decorative Wall Lamp with its clean lines and sleek design is a perfect fit.
Step 2: Gather the Necessary Tools
Once you've chosen the right aisle wall lamp, you need to gather the necessary tools for the installation. Here's a list of tools you'll typically need:
- Screwdriver set: Different types of screwdrivers may be required depending on the lamp and the mounting hardware.
- Wire strippers: To strip the insulation from the electrical wires.
- Voltage tester: This is crucial for ensuring that the power is off before you start working on the electrical connections.
- Drill and drill bits: If you need to make holes for mounting the lamp.
- Wall anchors: These are used to provide a secure hold in the wall, especially if you're mounting the lamp on drywall.
Step 3: Turn Off the Power
Safety should always be your top priority when working with electrical installations. Before you start any work, locate the circuit breaker that controls the power to the area where you'll be installing the aisle wall lamp. Switch off the corresponding breaker and use a voltage tester to double - check that the power is indeed off. This will prevent the risk of electric shock.
Step 4: Prepare the Mounting Surface
Inspect the wall where you plan to install the aisle wall lamp. Make sure it's clean, dry, and free of any debris or bumps. If the wall is made of drywall, you may need to use wall anchors to ensure a secure installation. Mark the position where you want to mount the lamp using a pencil. Use a level to ensure that the marks are straight and level.
Step 5: Mount the Lamp Bracket
If your aisle wall lamp comes with a mounting bracket, attach it to the wall using the appropriate screws and wall anchors. If you're using a drill, make sure to drill the holes at the marked positions. Insert the wall anchors into the holes and then screw the mounting bracket onto the wall. Tighten the screws firmly to ensure that the bracket is securely attached.
Step 6: Connect the Electrical Wires
Carefully remove the cover of the lamp housing to access the electrical wires. Most aisle wall lamps have three wires: a black (hot) wire, a white (neutral) wire, and a green or bare copper (ground) wire. Match the wires from the lamp to the corresponding wires in the wall. In most cases, the black wire from the lamp should be connected to the black wire in the wall, the white wire from the lamp to the white wire in the wall, and the ground wire from the lamp to the ground wire in the wall. Use wire nuts to connect the wires together. Twist the wire nut clockwise onto the ends of the connected wires until it's tight. Make sure there are no exposed wires.
Step 7: Attach the Lamp to the Bracket
Once the electrical connections are complete, carefully attach the lamp to the mounting bracket. Align the holes in the lamp housing with the screws on the bracket and gently slide the lamp onto the bracket. Tighten the screws to secure the lamp in place.
Step 8: Test the Lamp
After the lamp is installed, turn the power back on at the circuit breaker. Switch on the light switch to test if the aisle wall lamp is working properly. If the lamp doesn't turn on, double - check the electrical connections and make sure the power is on. If you still encounter problems, it may be necessary to consult a professional electrician.
Step 9: Adjust the Lamp
Once the lamp is working, you may want to adjust its position or angle to achieve the desired lighting effect. Some aisle wall lamps have adjustable heads or arms that allow you to direct the light where you need it.
Step 10: Final Checks
After the installation is complete, take a moment to do a final check. Make sure the lamp is securely mounted, the electrical connections are tight, and there are no exposed wires. Check that the light switch is working properly and that the lamp provides the right amount of light for the aisle.


At our company, we're committed to providing high - quality aisle wall lamps and excellent customer service. If you have any questions about the installation process or if you're interested in purchasing our aisle wall lamps, we're here to help. Whether you're looking for a simple and functional lamp or a more decorative and luxurious option, we have a wide selection to meet your needs.
Contact us today to start a procurement discussion. We can offer you competitive prices, professional advice, and reliable after - sales support. Let us help you find the perfect aisle wall lamp for your space.
References
- Electrical Installation Handbook: General guidelines on electrical wiring and installation.
- Lighting Design Basics: Information on choosing the right lighting fixtures for different spaces.